Introduction
Trustify profiles
Get to know the different Trustify profiles and how you can create and manage them.
What is a profile?
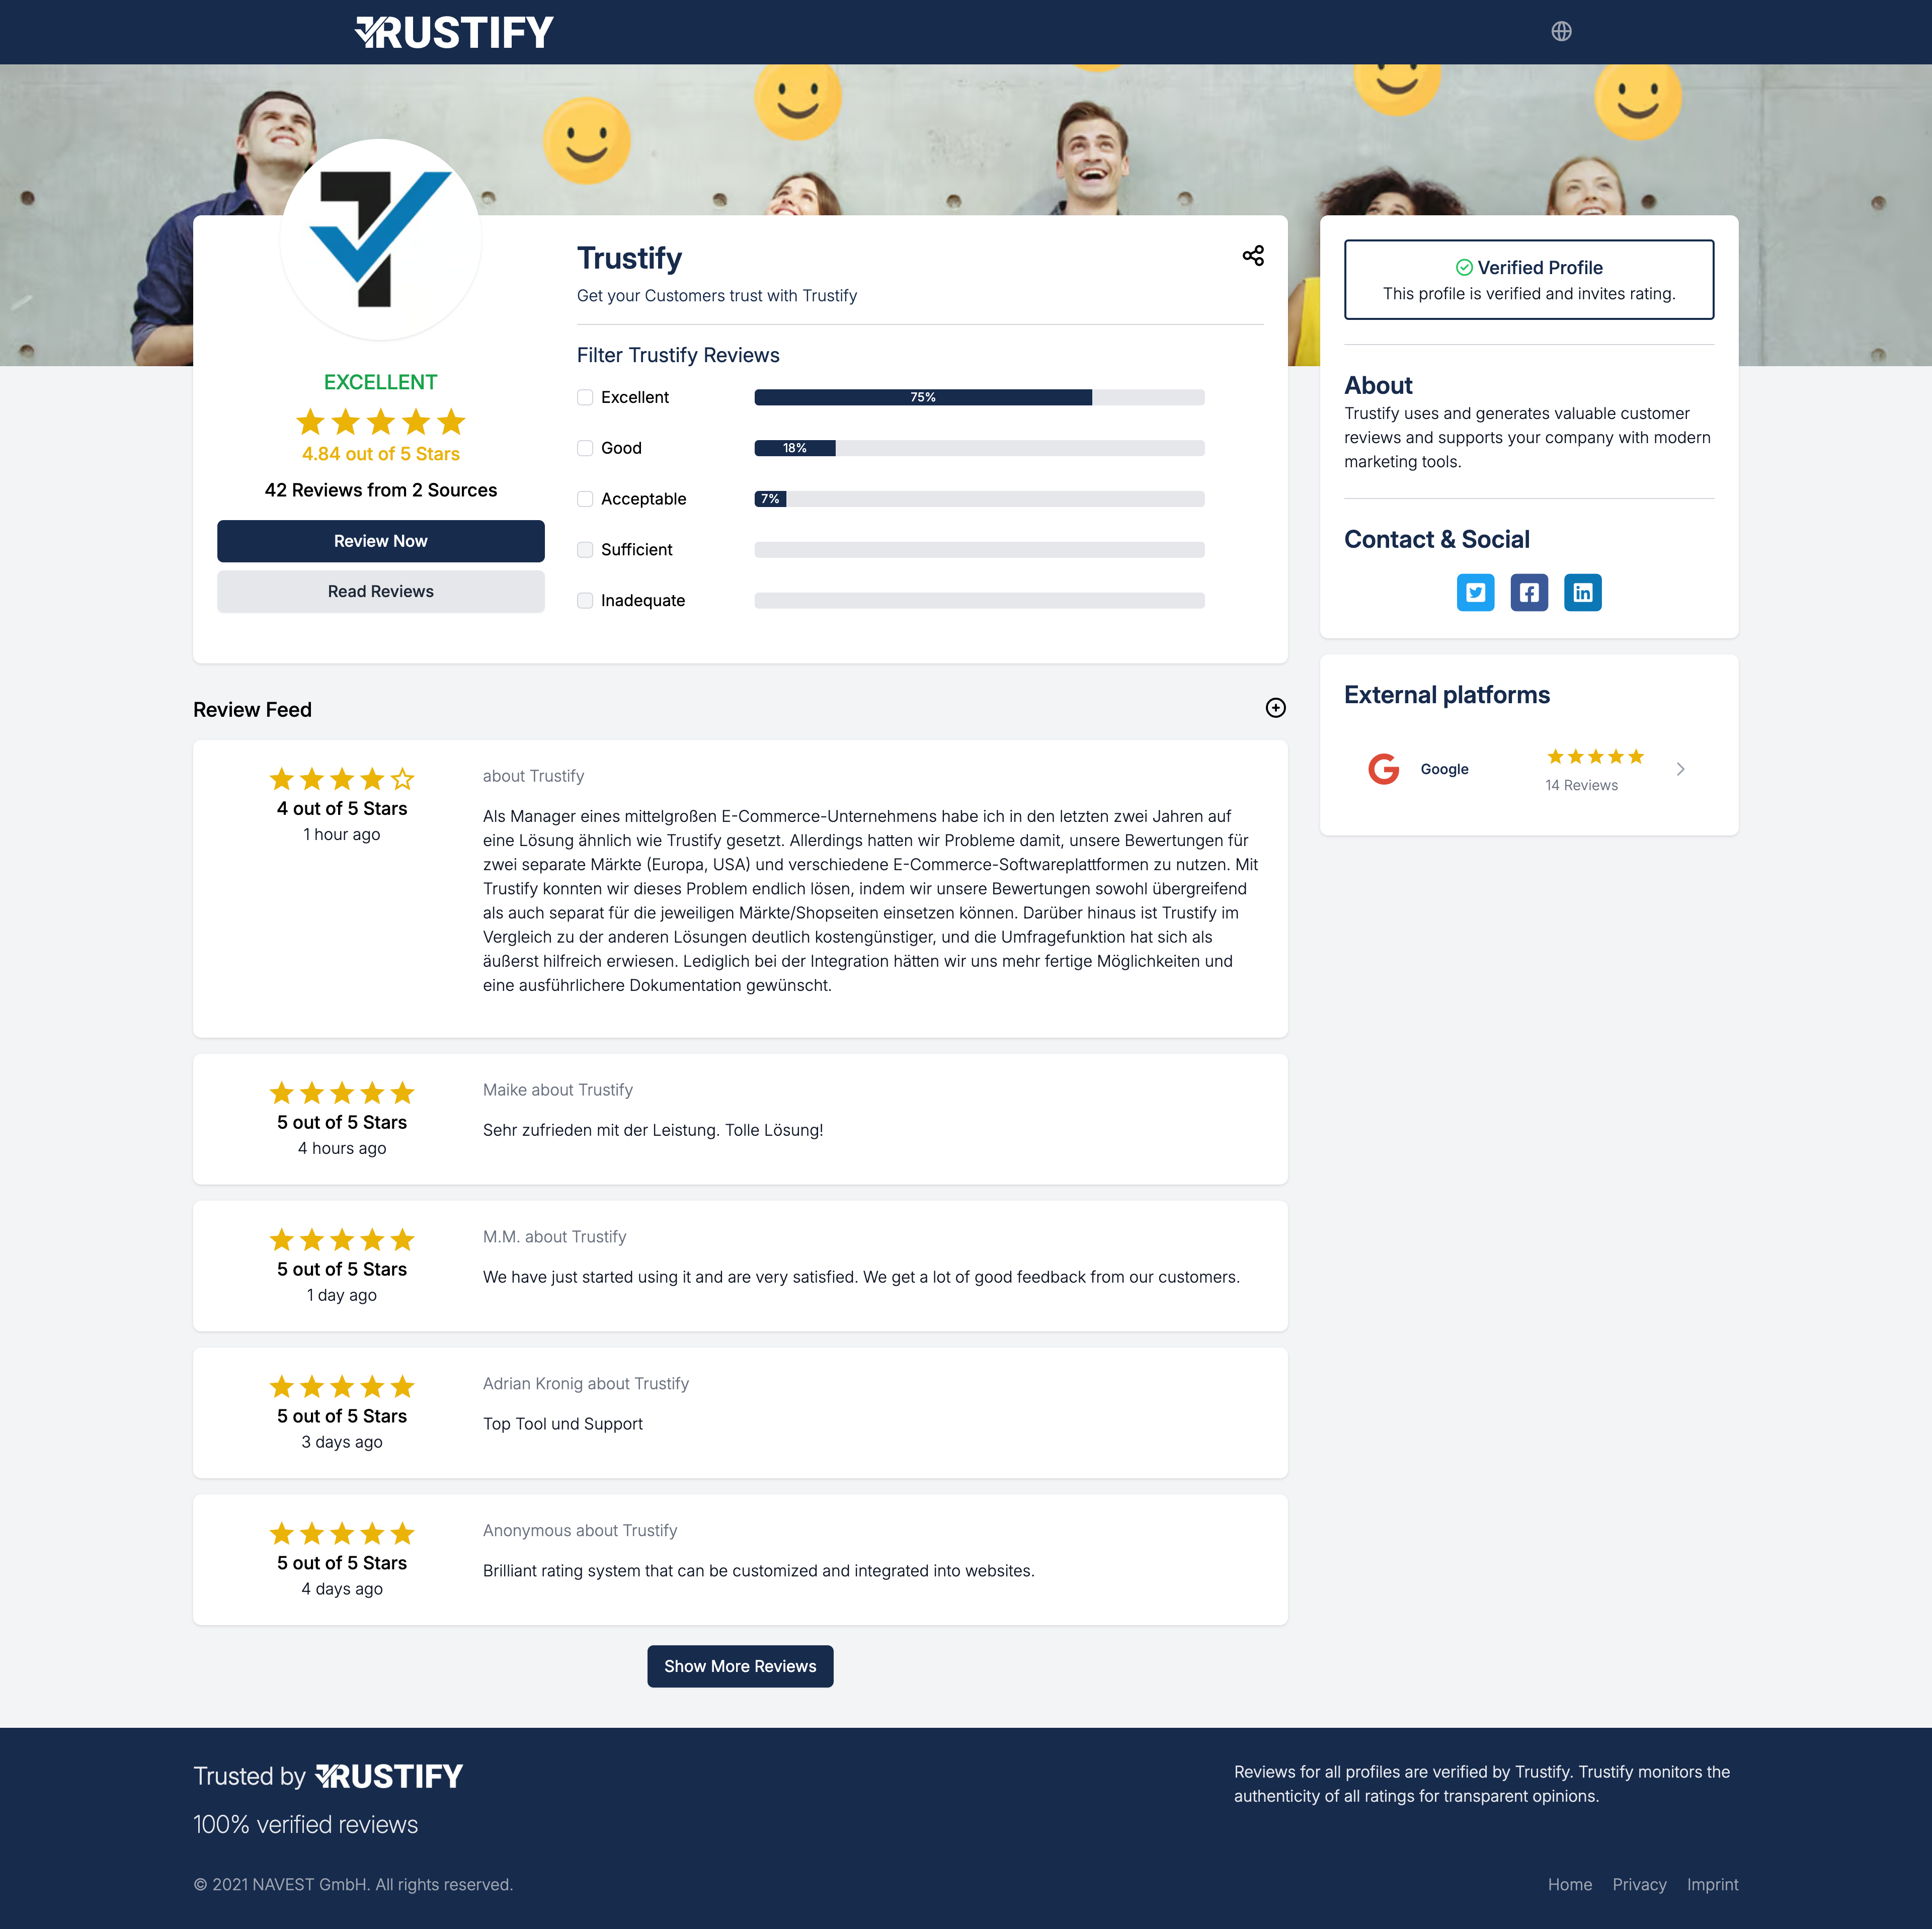
Trustify profiles are actually a landing page and present customer reviews about your company, person, region, product, etc. on one page. This makes it possible to present all your customers' experiences on a single page and use them to your advantage. Your visitors don't have to look for reviews about you on different platforms and Trustify is ad-free and prevents your visitors from jumping to competitors by preventing them from coming across other and similar providers.
Types: Standard profile and Master (Collection) profile
We distinguish between two profile types: Standard Trustify profiles and Trustify Master, also named Collection, profiles.
By default, you create a standard Trustify profile, which allows you to collect and import reviews, present them on the profile page and your website. But now there is the possibility that you have a certain corporate structure. Let's take an example:
Your company is active in 3 countries and so you create a Trustify profile for Switzerland, Germany and the USA. Or you have 3 stores and therefore create 3 profiles. But it's still the same company and you only have one website.
So that you can present the reviews in a bundled form for your entire company and your website, you have the option of creating a Trustify Master profile. A Master profile combines several standard profiles - in the example above the 3 profiles by country or store.
Creation and management
Create a Standard profile
To create a profile, select Profiles in the dashboard menu and then click on the Ceate button. Fill in the relevant information. Here is an explanation of the individual setting options:
- Type: Here you can choose between a Standard or Master (Collection) profile.
- Default Language: A profile always needs a basic language; you can provide content for other languages later.
- URL Slug: This is nothing other than the URL ending under which this profile can later be accessed, in other words the exact and unique link.
- Default Survey: Here you can define an already created survey that should be used by default when someone submits a review of this profile. You do not need to specify one.
- Display name of survey on reviews: If you activate this, the survey name will always be displayed in addition to a review. This makes sense if you are doing several surveys.
Complete the creation by clicking on Create.
Manage a profile
You see your created profiles in the menu under Profiles. You can click on Edit and add all further information and settings. The settings are divided into different categories:
- General: You have already made these settings during creation but you can adjust them at any time, like everything else.
- Images: Upload a logo and header image to personalize your profile.
- Contact Details: This information is displayed in the profile for visitors to contact you. Don't forget to link your social media accounts too. The URL of the website is also used to lead visitors back to your website.
- External Sources: Here you can add other review platforms to give your customers an overall view. You can find more details here.
- Notifications: Enter the e-mail addresses to be informed about activities, such as a new review, for this profile.
Create a Master (Collection) profile
This action makes sense if you already have at least 2 standard profiles. You create the Master profile in the same way as a Standard profile, except that you select Master (Collection) as the type.
You can use the Master profile as a Standard profile. The difference is that you can add Standard profiles to the Master profile which are then displayed uniformly within the Master profile page for your visitors and the Trustify Score is calculated from all profiles (including the reviews on the Master profile).
To attach standard profiles to the master profile, select Profiles in the dashboard menu and then click on the Edit button of the desired Standard profile. In the settings General at option Parent Profile you can select the desired Master profile. This standard profile is now attached to the Master profile.